

As you’ve noticed from some of my AARs, I am increasingly relying on reloads to see myself through classes and matches, especially with 9mm. I have a pretty good setup for reloading 9mm – a Dillon 650XL with case feeder and a DAA primer filler. But one thing I was missing was a bullet feeder.
DAA makes a perfectly good bulletfeeder, but it also costs almost $500. After being cooped up at home for so long, I wanted a project, so I decided to build the OpenBulletFeeder by AmmoMike83 as found on Thingiverse. This involved substantial 3D printing and wiring. Since this is a slightly complex project, I thought I would go through how I went about it.
The first thing I had to figure out was what parts I needed. The Thingiverse description does not necessarily do a great job of explaining how to figure this out, so I’ll narrow it down:
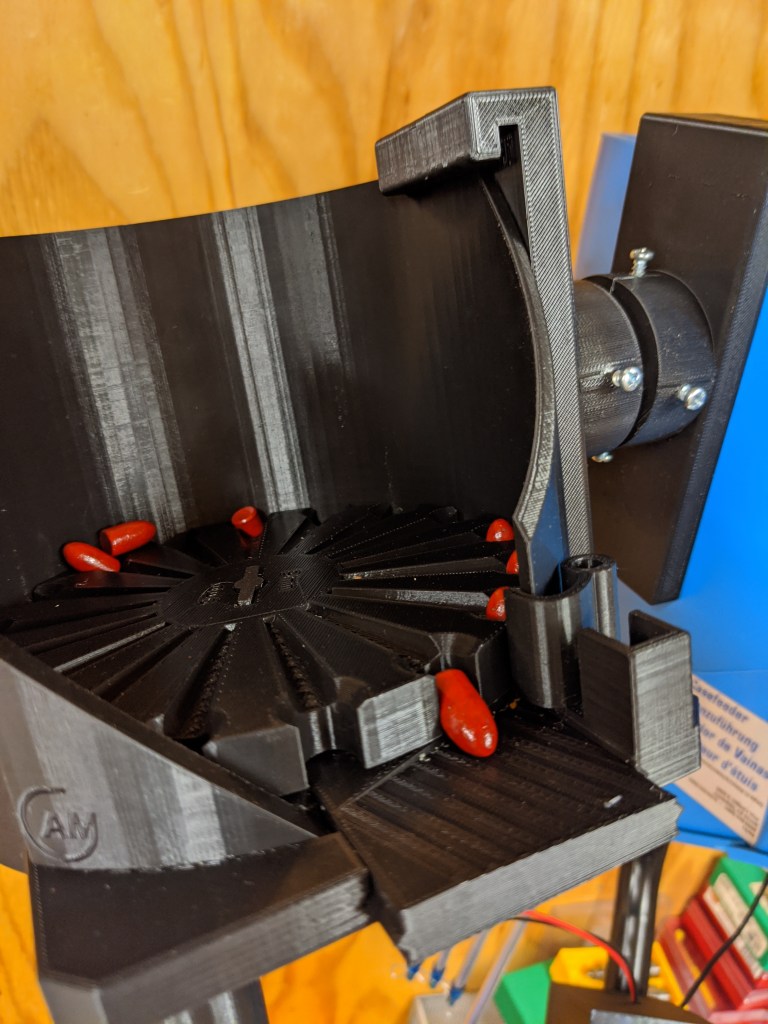
- You need to decide on what caliber you are dropping. This will impact the collator plate, spring tube size, spring housing, drop tube diameter, and what bullet feeder die you need.
- You need to figure out what “stop” mechanism you’re using to tell the bullet feeder to stop running when there are bullets in the top of the drop tube. You have a choice between a light barrier, small switch, and large switch. This obviously impacts the drop tube and your wiring choices.
- You need to decide on a motor, as this affects the choice of your base.
I went with the JGY370 @ 10RPM (270 degree rotation), light barrier, and 9mm (large spring, 10mm drop tube). In retrospect, I would STRONGLY recommend trying the small switch first, because the wiring to use the light barrier is obnoxiously difficult if you’re not used to doing this kind of thing. The switch is far easier to wire up. (There are wiring diagrams in the OBF files directory, and you should probably take a look.)
Here is a very short list of parts I used, hopefully semi-complete:
- bf_v3_base_WH120_JGY370_270degrees.stl
- bf_v2_collator_plate_9mmLuger.stl
- bf_v2_adj_turning_plate_double_slide.stl
- bf_v2_flipper_v2.stl
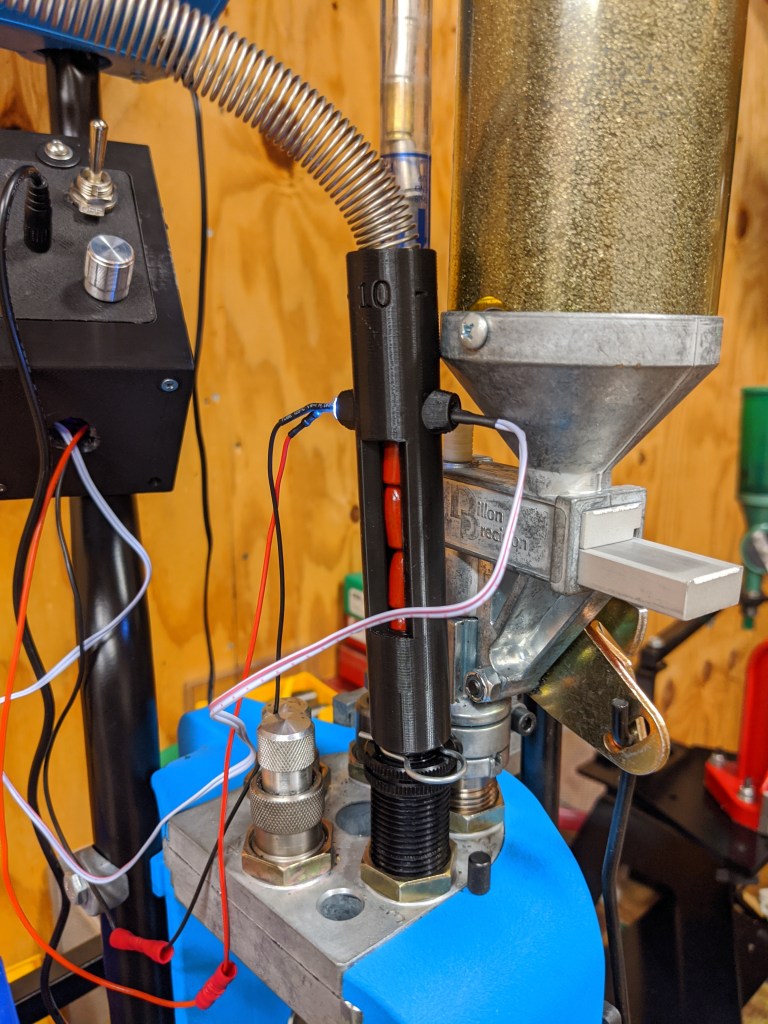
- bf_v2_drop_tube_light_barrier_10mm.stl
- bf_v2_spring_housing_large_v2.stl
- bf_v2_mount_hang_WH120.stl
- Control_Box_Cover.stl
- Control_Box.stl
- Control_Box_Bottom.stl
- Connector_JGY370_Shaft_Plate_OpenBulletFeeder
- WGGE WG-026 10 Pieces and 5 Colors Test Lead Set & Alligator Clips,20.5 inches (1 PACK) (connected the motor with these – soldering would have been better, but I don’t know how to solder)
- XFasten Double Sided Tape, Removable, 1.5-Inch by 15-Yards, Single Roll, Double Sided Adhesive Tape for Arts and Crafts, Woodworking, and Holding Down Carpets – Residue-Free (used this to mount my boards into my box)
- uxcell Photosensitive Sensor Module Light Intensity Detection with Wire DC 12V (the wiring is not obvious on this, you will have to play around)
- 12V 2A Power Supply AC Adapter, AC 100-240V to DC 12 Volt Transformers, 2.1mm X 5.5mm Wall Plug (12 Volt – 2amp – 2pack) (this worked pretty well for me – superglued the connector into the housing)
- Bringsmart JGY-370 12V 10rpm DC Worm Gear Motor 12 Volt High Torque Engine Mini Turbine Worm 6-24V Reducer Electric Motor Self-locking for DIY Mini Geared Motor (JGY-370 12V 10rpm) (10 RPM VERSION!!!)
- LAOMAO 1 Pack (20 Bulbs) 5mm 12V DC White LED Pre-Wired Round Top Bulb Lamp For DIY Car Boat Toys Parties (5mm, White) (these things are a little trashy, but they’re bright and cheap)
- VIGRUE M2 M3 M4 M5 Stainless Steel Screws and Nuts Flat Washers 1080 Pcs Hex Button Head Cap Assortment with 4 Wrenches
- Various #6×1/2 and #6×3/4 sheet metal screws
- Heavy Duty Toggle Switch 20/15A 125/277V, 2 HP with Waterproof Rubber Boot UL cUL Certified (this was maybe a little too heavy duty, but it worked)
- XLX 2PCS Mini PWM DC Motor Governor 1.8V 3V 5V 6V 12V 2A 1803BKW Adjustable Speed Light Temperature Controller Regulation Switch Current limiting Ultra small LED dimmer with Speed Control Knob
- Various wires and crimp connectors
- Mr.BulletFeeder by DAA Die Assembly Only Caliber: 9/38S (I could have 3D printed a die, but this seemed easier)
- Mr.Bulletfeeder output spring and extension adaptor Size: Large (this is how you get the spring tube)
- Mr.BulletFeeder by DAA Powder Funnel – Dillon Caliber: 9/38S (while, strictly speaking, not part of this build, it is de facto a necessity to make the bullet feed die work correctly)
- Ballpoint pen spring for the flipper arm
To print everything, I bought an Ender 3 Pro from Microcenter for $200. I have another 3D printer, but it’s simply not big enough to print some of the parts needed for this printer. On the positive side, the Ender 3 Pro (or V2, if you want to spend more money) is phenomenal for the price and not that difficult to assemble. I used the profile in Simplify3D and cranked out the parts in PLA with essentially zero tuning.

I started with the given sample configuration to figure out what parts I needed to print. Unfortunately, the Thingiverse sample configuration is incomplete; you will also need to print the large spring housing (or small spring housing if you’re doing < .35 rifle rounds).
Print time is long. Using my default Simplify3D settings, it took about 72 hours to get everything printed (albeit I printed a few parts I didn’t wind up using, so it could be shorter for other people). You can’t really rush these prints; the collator and base are pretty big, and the tolerances are tight enough in a couple places that you want your printer dialed in appropriately. I used PLA for everything, which seems perfectly adequate for the stresses involved.
The next issue I ran into was finding a rotor to turn the collator using the motor. No interface is mentioned for this, so you’re left with trying to hack something together. There is, nicely enough, a rotor you can print that works perfectly. It’s not the strongest design in the world, so you do need to make sure it’s aligned correctly with the motor rod’s flat side when installing it.
Another missing piece of information: the spring to use for the flipper arm. It turns out you can just raid the spring out of a ballpoint pen, and it works perfectly. I originally tried to use a spring that was WAY too strong, and the motor did not have enough torque to overcome it.
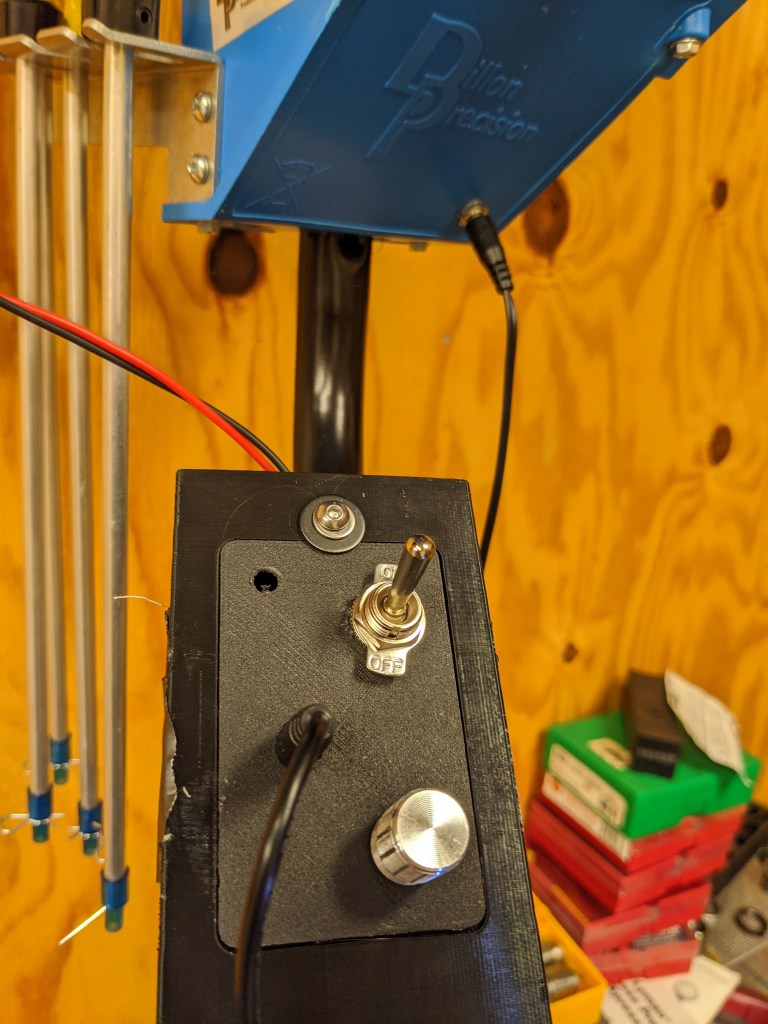
For an electronics box, I used this design. It wasn’t amazing for what I needed, but I drilled in enough holes to get the wires where they needed to go. I would strongly suggest biasing your wiring so that you have a LOT of wire length to go to the motor, because you will be somewhat limited in how far your optical sensor can run to the drop tube.
OK, so once you’ve got everything 3D printed and assembled, you have a new problem: making it work. You need to give the OBF a decent amount of backwards tilt to avoid bullets falling out of it (and on top of you and/or your press). However, if you’re having problems with the bullets not feeding base down, all you need to do is adjust the double slider turning plate is adjusted by pulling it outwards slightly. (There is another design on Thingiverse that supposedly does a much better job with flat nose bullets if you’re using those.)
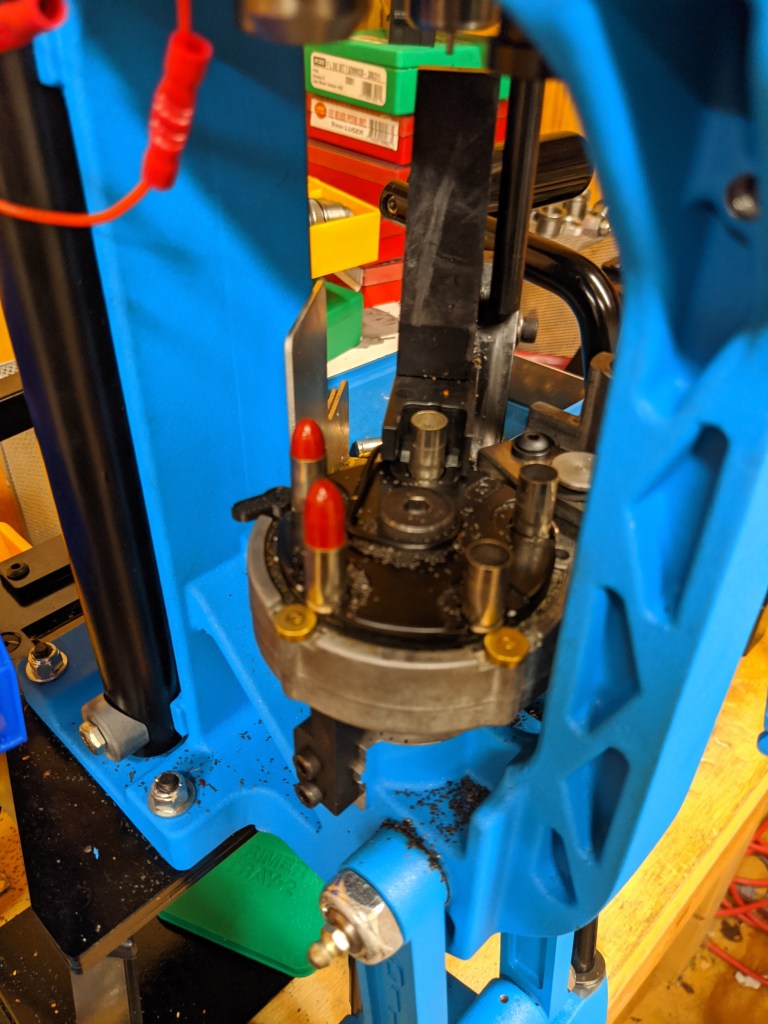
The DAA bulletfeed die also needs careful installation… you basically load it up with bullets, pull the press lever to get the plate with a case as high as it will go, and then screw the die down until it JUST releases a bullet on the case. It took me a couple tries to get it dialed in, but once you do, it’s pretty reliable. The powder funnel that DAA sells is a must; once you get the powder feeder tuned, the bullets stick into the case with just the right amount of depth so that they don’t get tossed around by the plate movement on the press.
Does this project sound like a lot of work? Yes, because it was. This was definitely not a quick project for me. But… take a look at this video and tell me if it wasn’t worth it.
I’d guess I probably saved a couple hundred bucks or more over the DAA bullet feeder, and I DEFINITELY learned quite a lot doing this project. So, on the whole, I’d say it was a great experience, and kudos to AmmoMike83 for allowing free distribution of such a useful tool.
If you like the bullet feeder but aren’t up to making your own, “Karl Bibb” on Facebook sells his own somewhat-modified versions that are well-regarded for ~$200. He also sells a case feeder variant.
ETA (9/15/2020): Made a very slight change and used the bf_v2_mount_hang_WH120.stl one-piece hanger instead of the three piece hanger. The three piece hanger is nice because it’s easily adjustable, but the one-piece is a lot more sturdy and not super hard to adjust either (you basically screw it into the case feeder a bit at the appropriate angle). This significantly cuts project costs, too.

Hey, good stuff buddy!
I’m trying to do my own 3D printing but running into some problems
just wondering if you can help me out
send me an email
LikeLike
do you mind sharing the files, thingiverse keeps taking them down and I’m looking to make one of these.
LikeLike
I can’t do that. 1) they’re not my files to share and 2) I don’t really need DAA coming after me. 😛
LikeLike